Loading...

Back to Library
Software
GlobalTIS Saab
Security access and SPS programming for 9-3 and 9-5 models.

Description
Technical Procedure
GlobalTIS Guide
GlobalTIS is the backbone of Saab electronic diagnostics under the GM era. Acting as a local server (offline equivalent of TIS2Web), it is the only way to provide the 'Security Access' required by the Tech2 for sensitive operations like key pairing. It also hosts the SPS (Service Programming System) for flashing ECU firmware and calibrations. This guide details the full step-by-step installation.
1
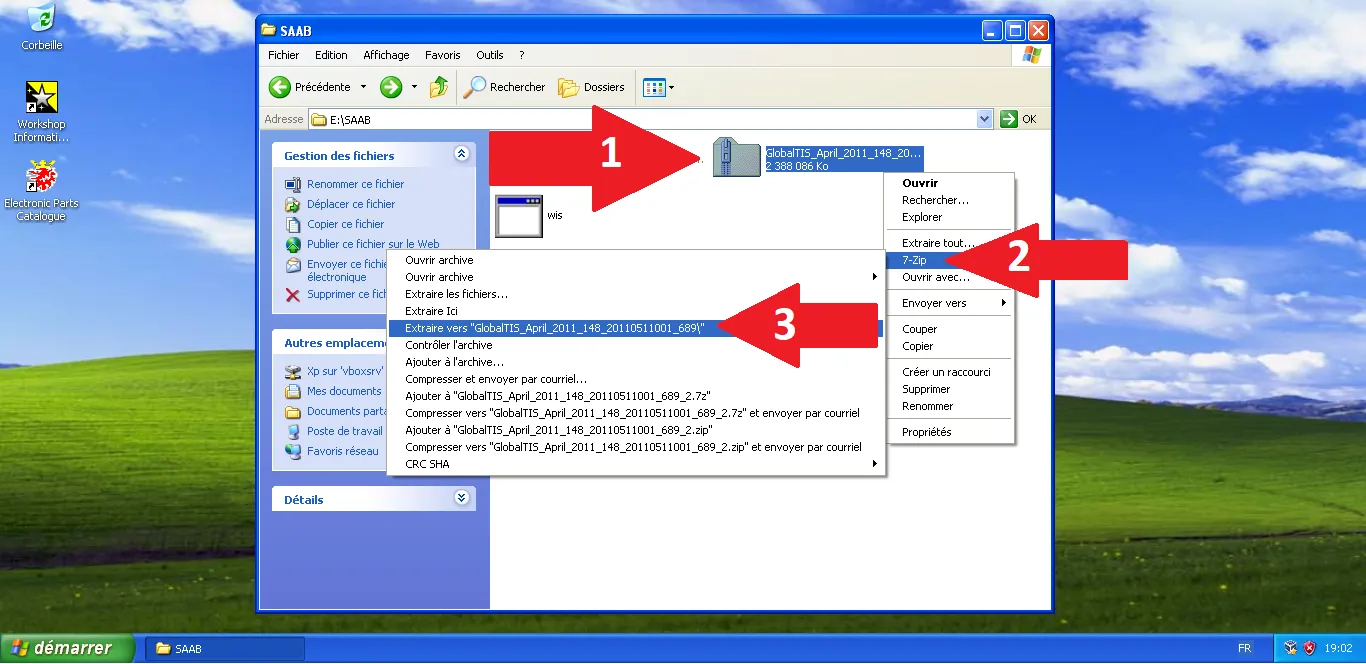
Extract GlobalTIS archive
Right-click the GlobalTIS archive then 7-Zip menu > 'Extract to...'.
Step Visual Reference
2
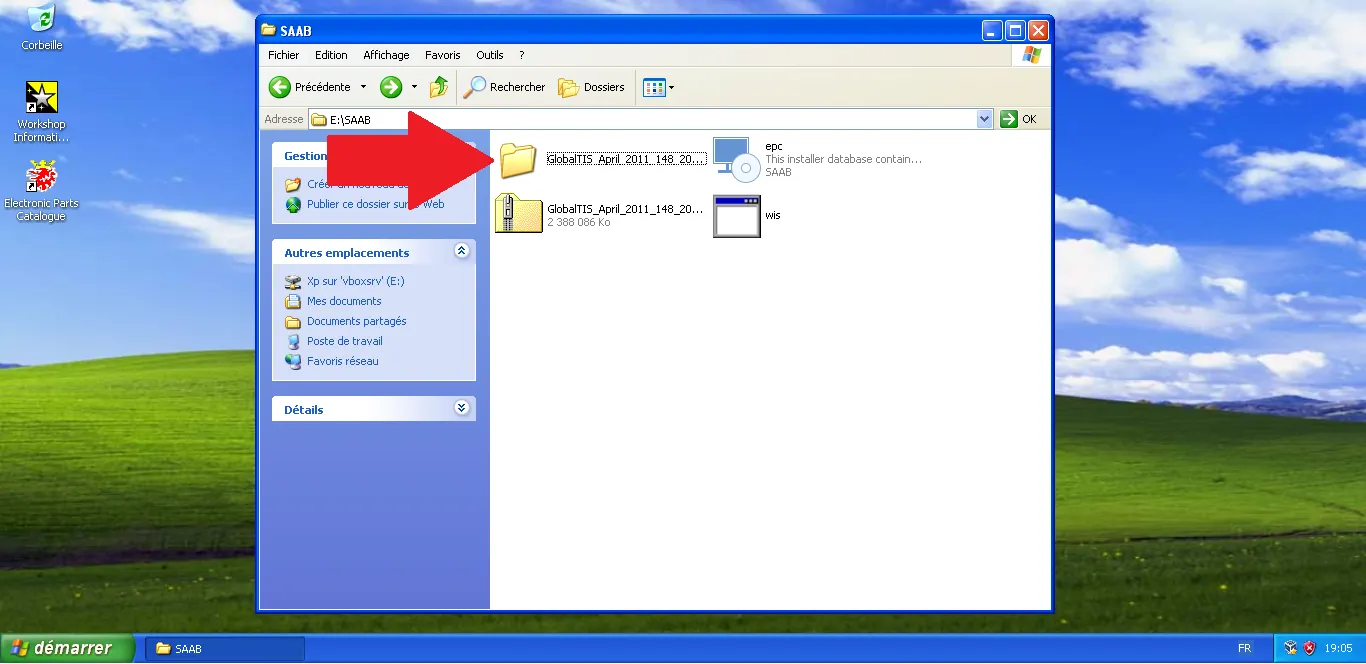
Open extracted folder
Select the newly created GlobalTIS folder in the SAAB directory.
Step Visual Reference
3
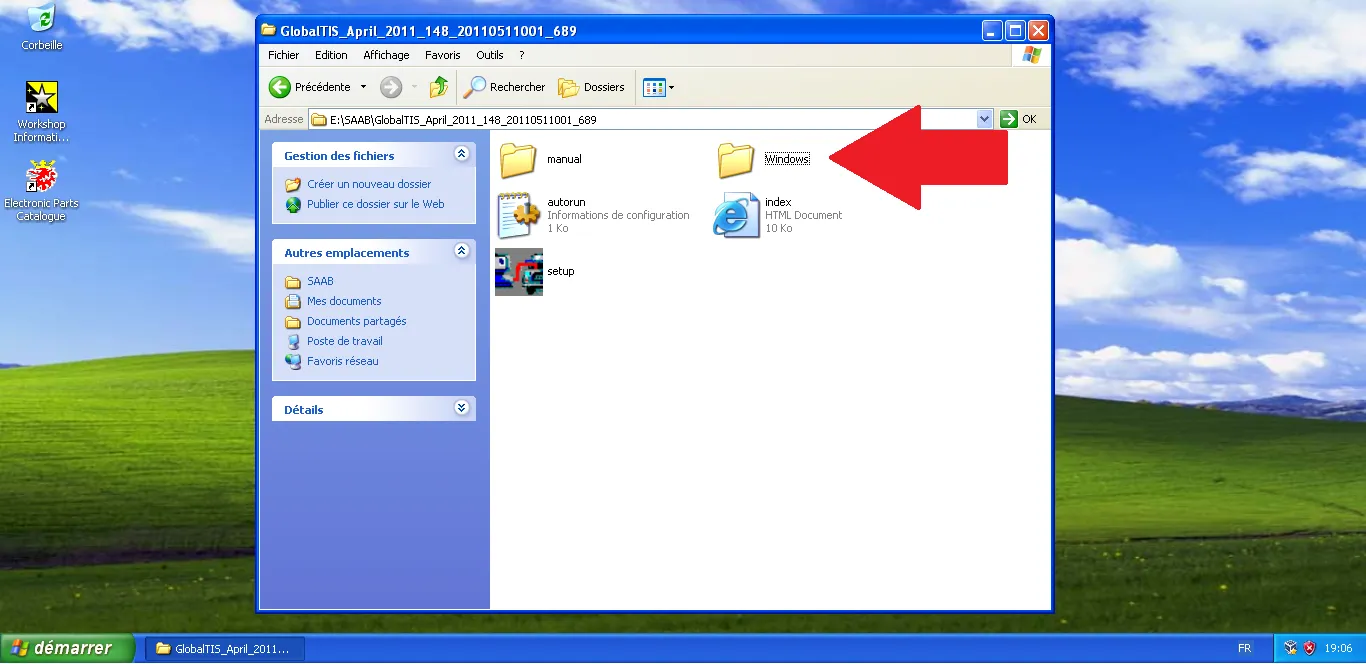
Access Windows folder
In the extracted GlobalTIS folder, open the 'Windows' folder.
Step Visual Reference
4
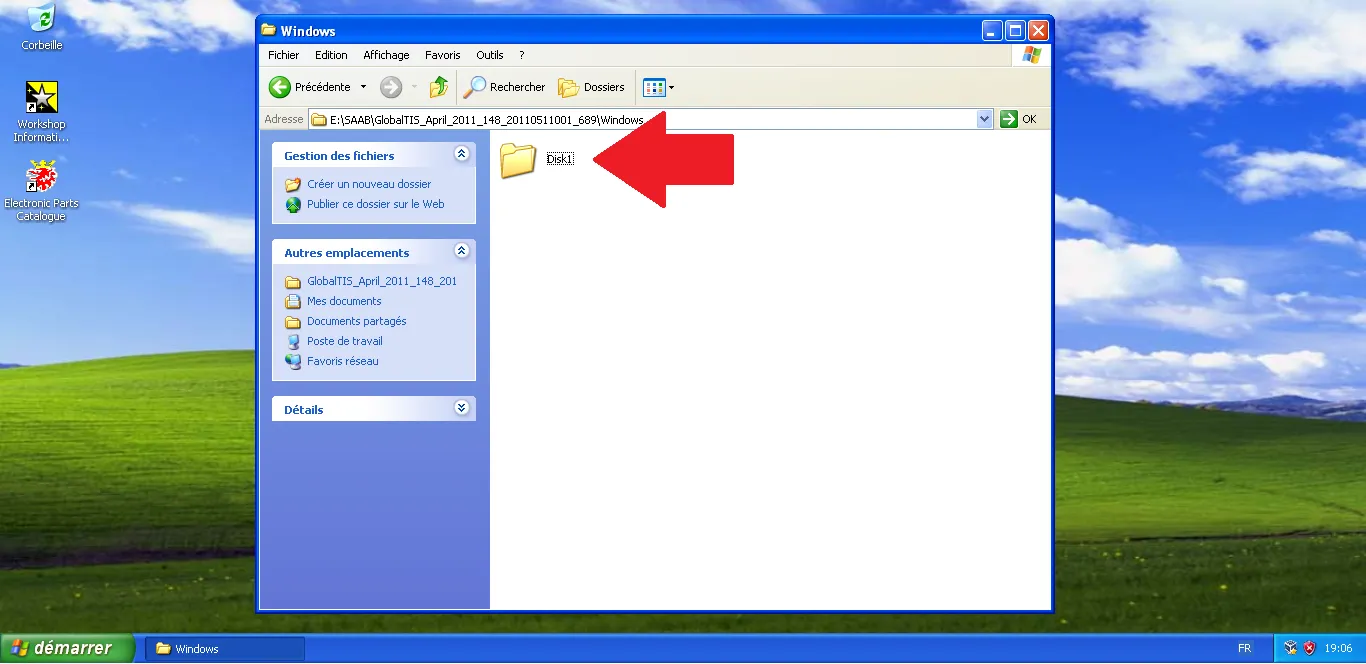
Open Disk1 folder
In 'Windows', open the 'Disk1' folder.
Step Visual Reference
5
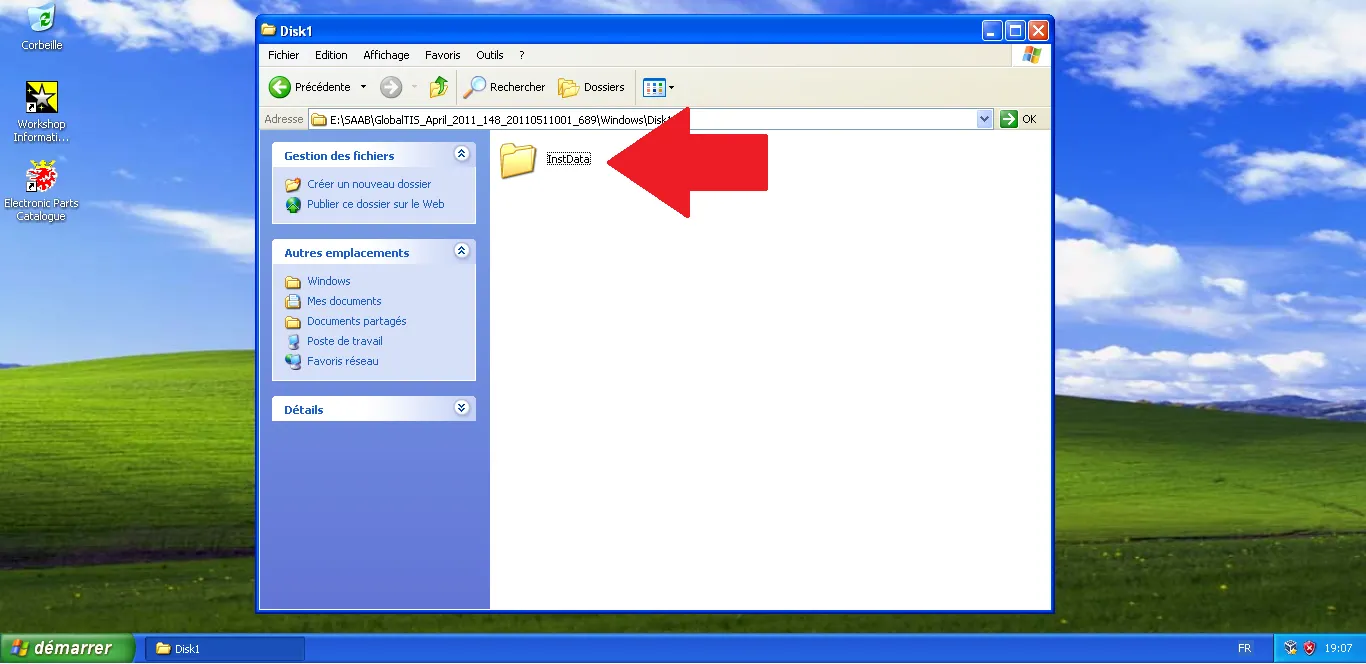
Open InstData folder
In 'Disk1', open the 'InstData' folder.
Step Visual Reference
6
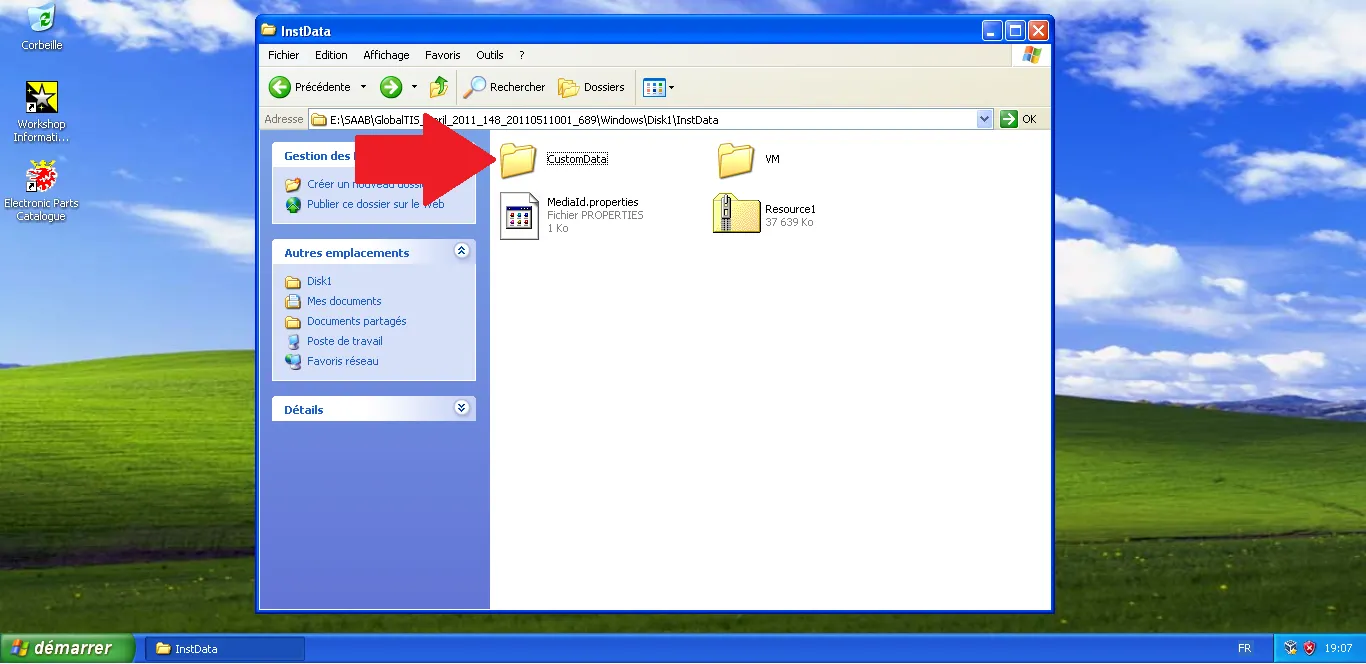
Open CustomData folder
In 'InstData', open the 'CustomData' folder.
Step Visual Reference
7
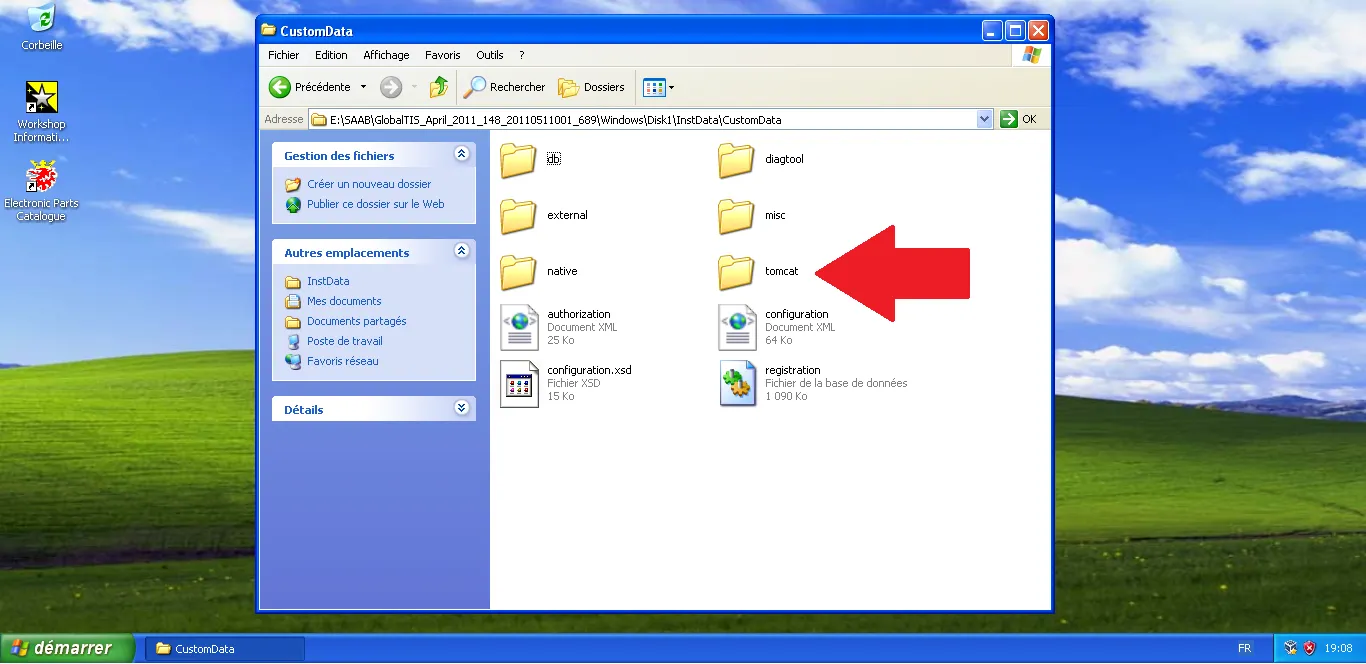
Open Tomcat folder
In 'CustomData', open the 'tomcat' folder (server components).
Step Visual Reference
8
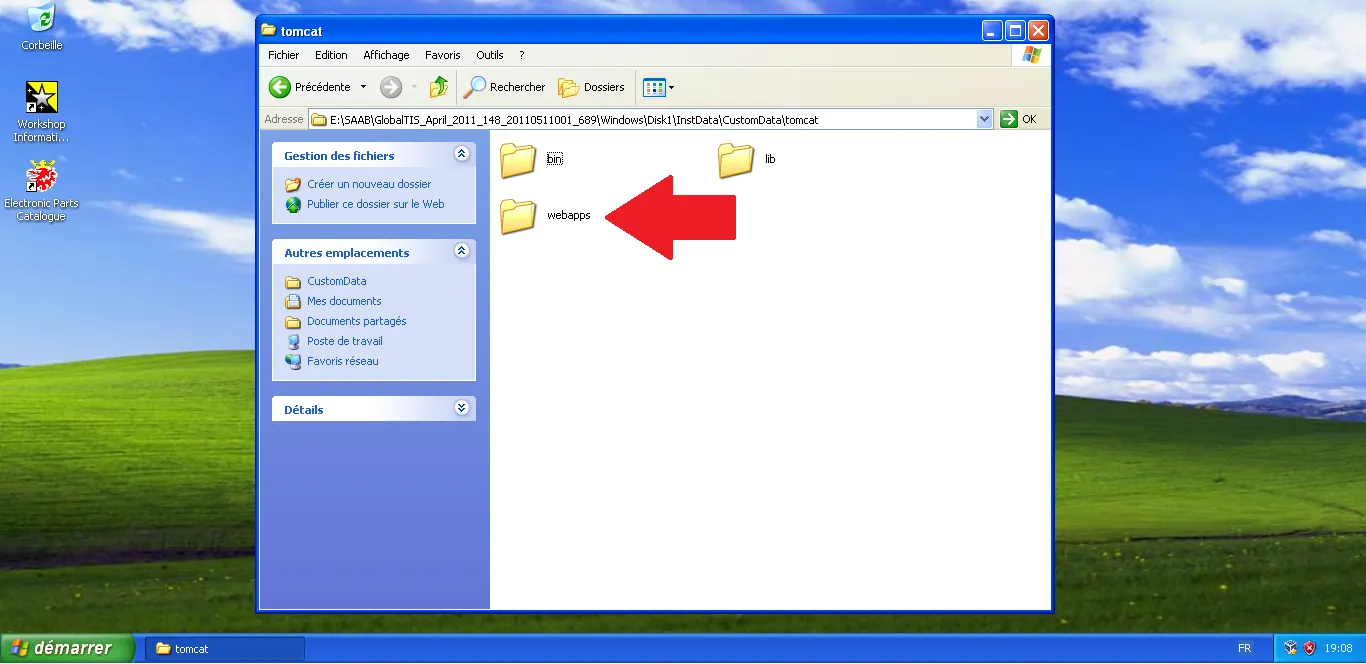
Open webapps folder
In 'tomcat', open the 'webapps' folder.
Step Visual Reference
9
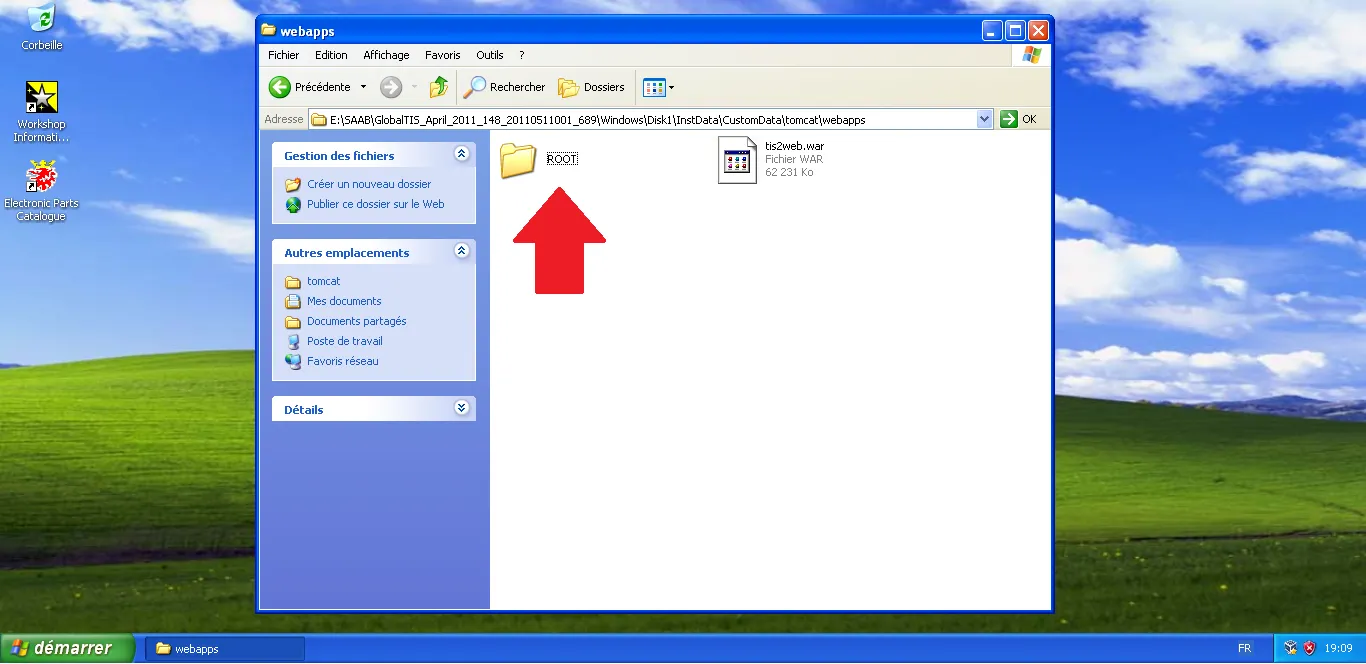
Open ROOT folder
In 'webapps', open the 'ROOT' folder.
Step Visual Reference
10
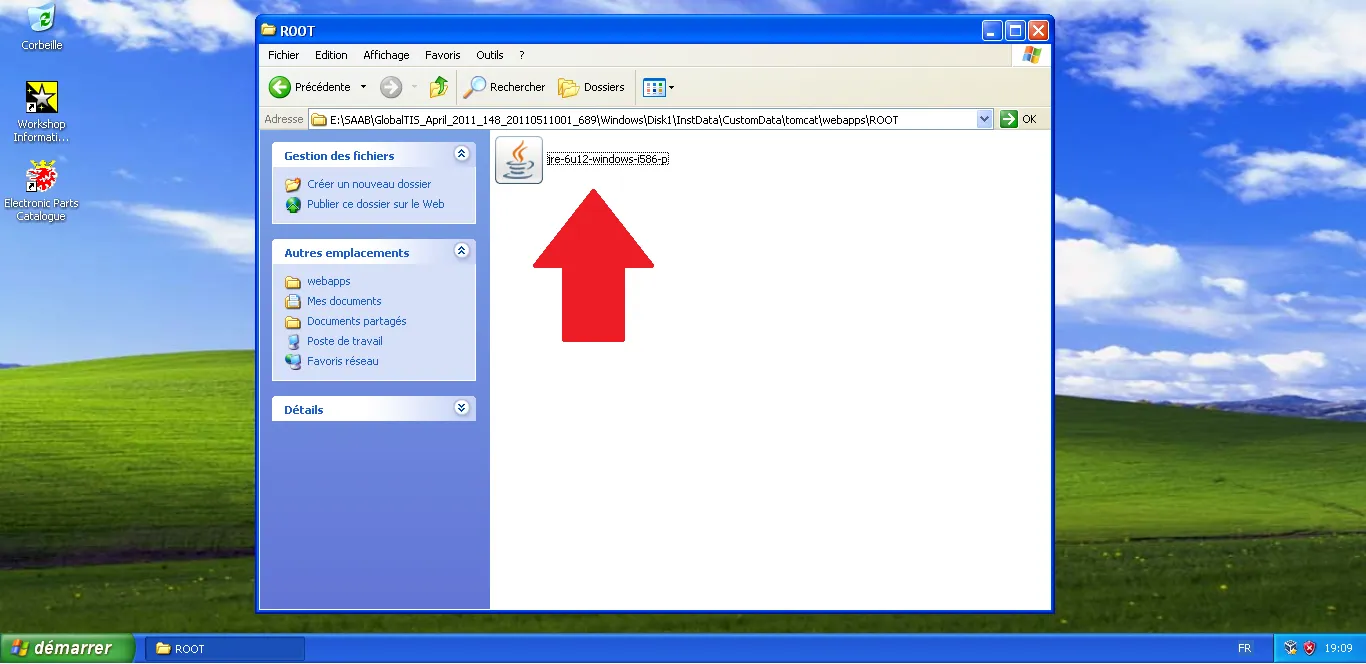
Launch Java installer
Execute 'jre-6u12-windows-i586-p.exe' to install Java.
Step Visual Reference
11
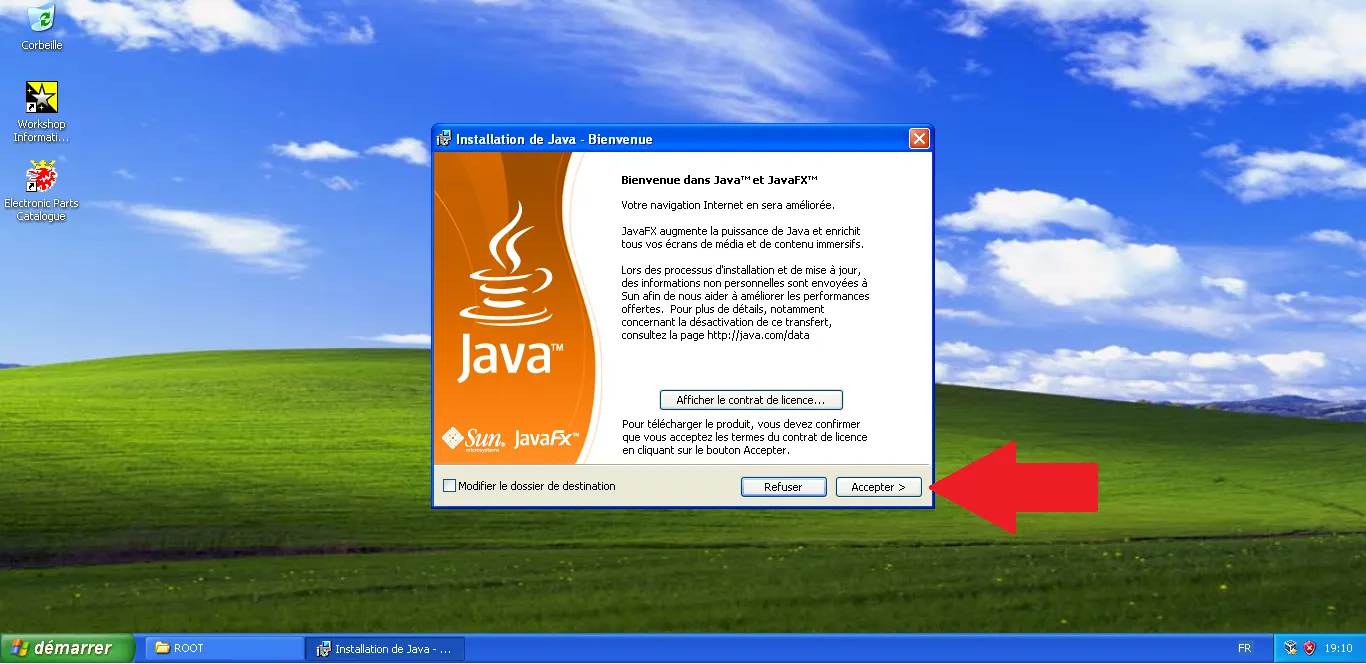
Accept Java license
In the Java installation wizard, click 'Accept'.
Step Visual Reference
12
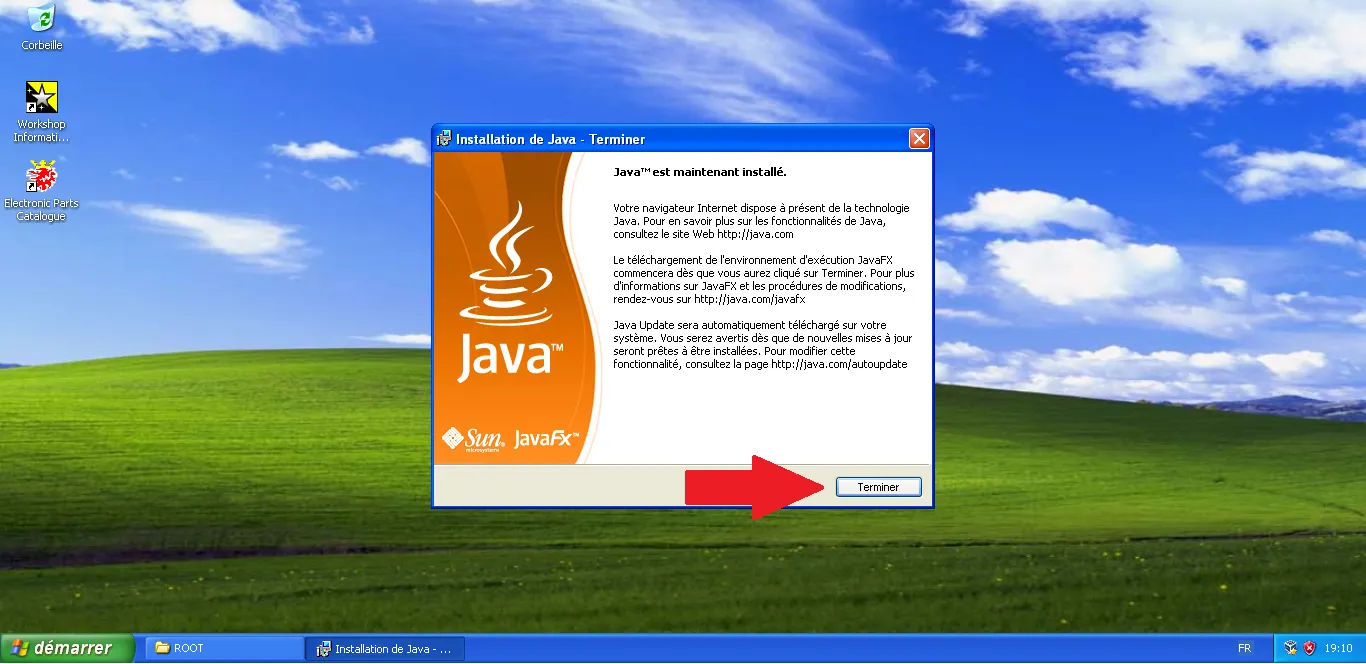
Complete Java installation
When Java is installed, click 'Finish' to close the wizard.
Step Visual Reference
13
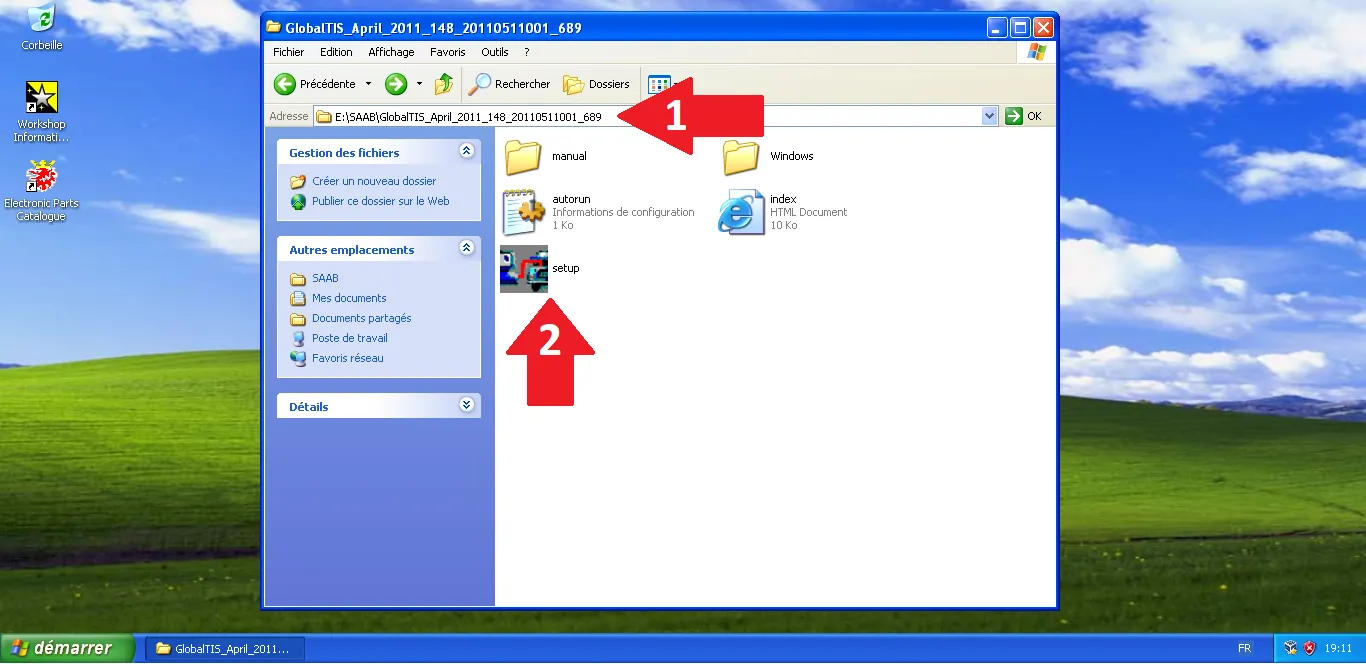
Launch GlobalTIS setup
Go back to the package root and execute 'setup'.
Step Visual Reference
14
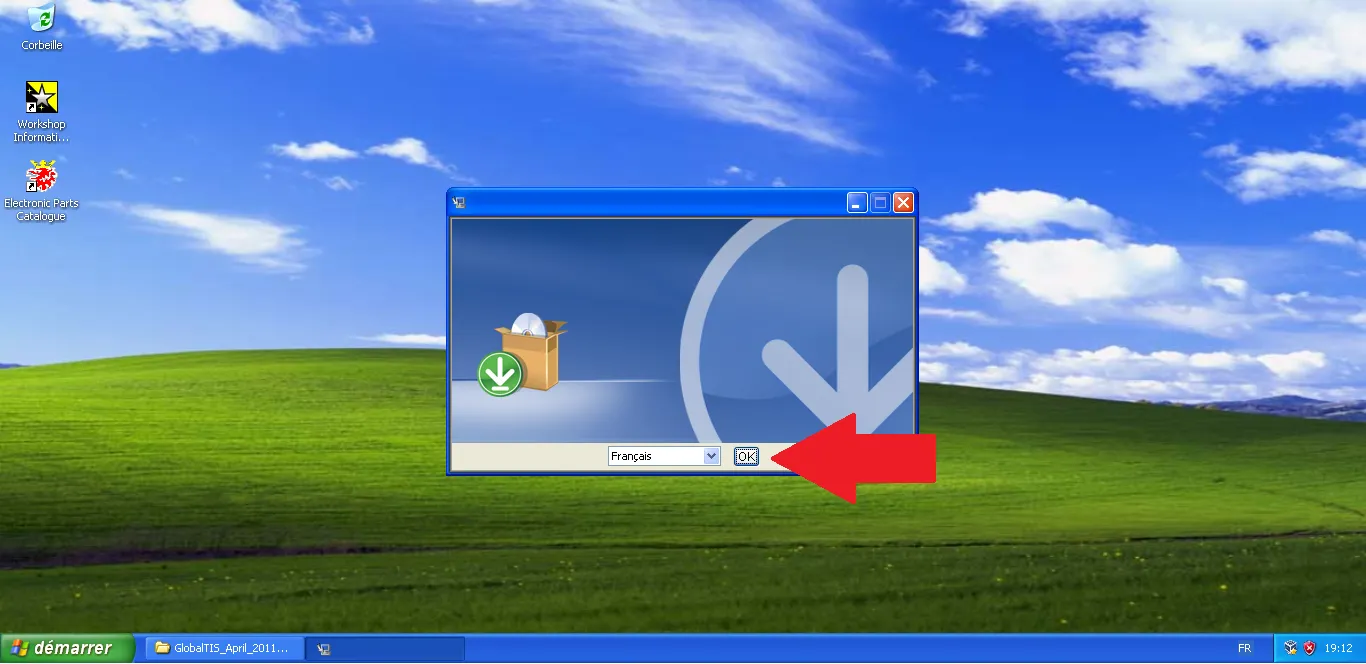
Select language
In the selection screen, choose your language then click 'OK'.
Step Visual Reference
15
Start GlobalTIS
At the GlobalTIS introduction screen, click 'Next'.
Step Visual Reference

16
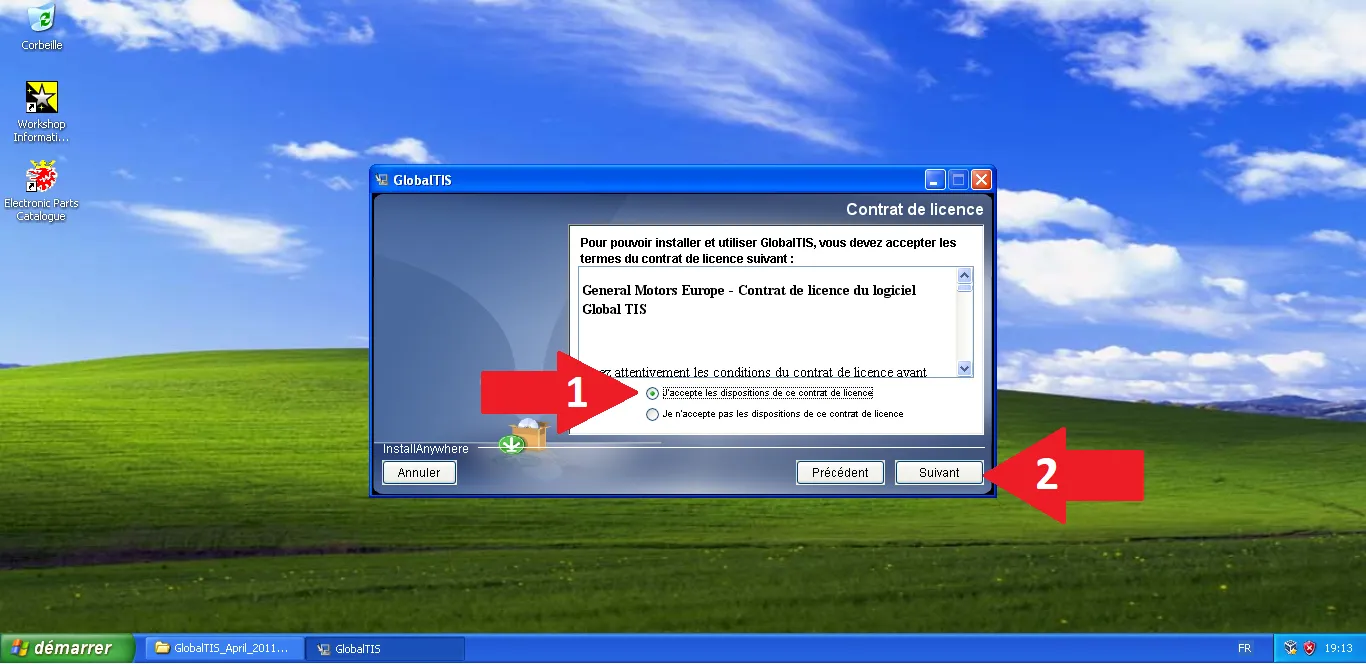
Accept license
Check 'I accept...' on the license agreement, then click 'Next'.
Step Visual Reference
17
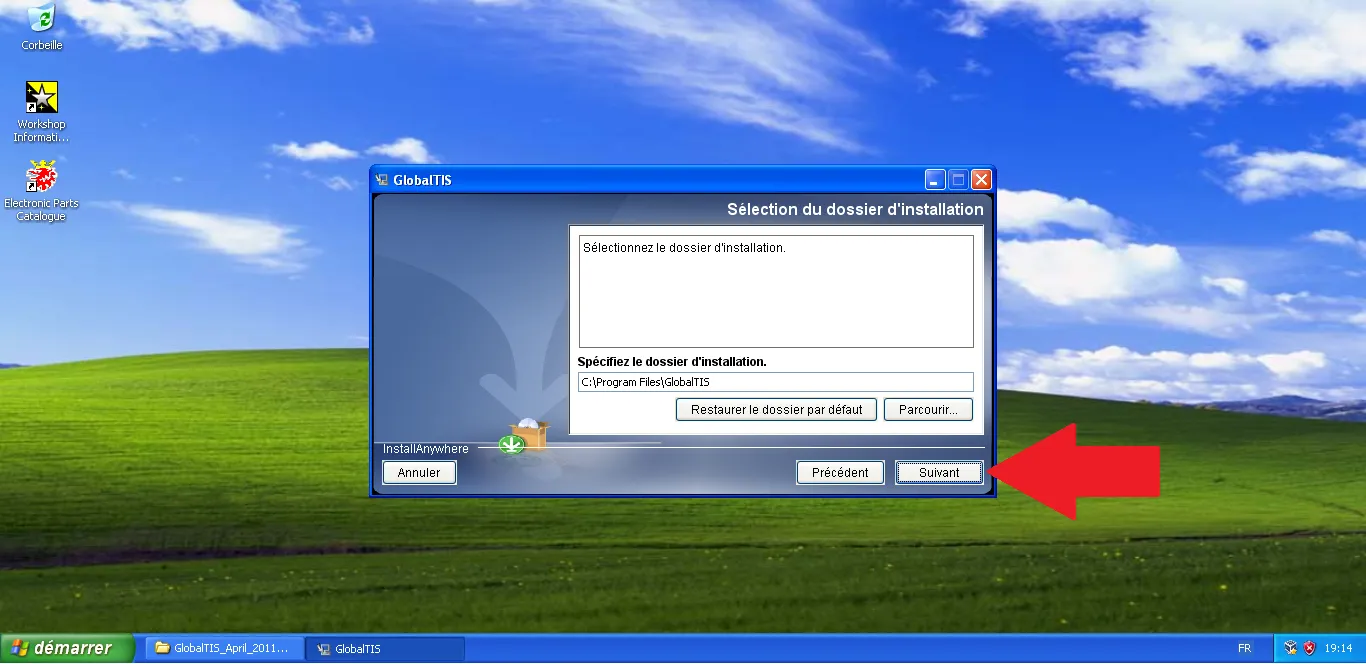
Confirm folder
Keep the default installation path then click 'Next'.
Step Visual Reference
18
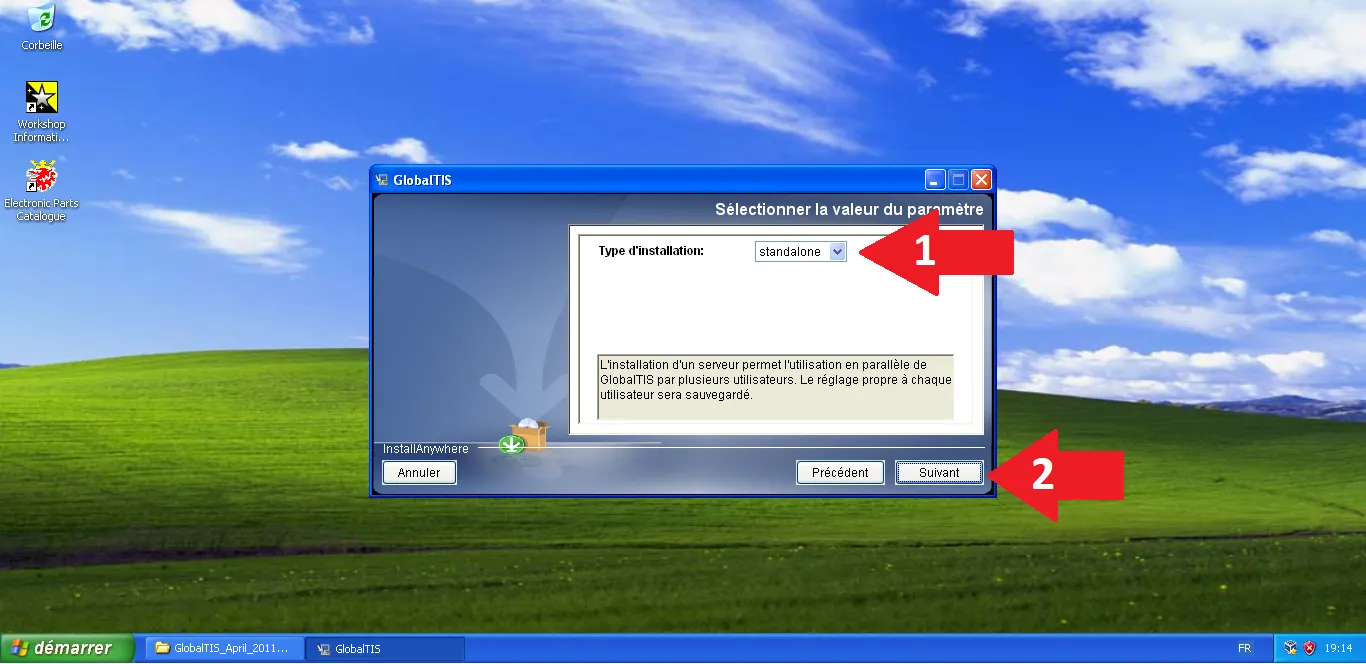
Standalone type
Choose 'standalone' as the installation type, then click 'Next'.
Step Visual Reference
19
Validate localhost
At the 'Host' step, keep 'localhost' and click 'Next'.
Step Visual Reference

20
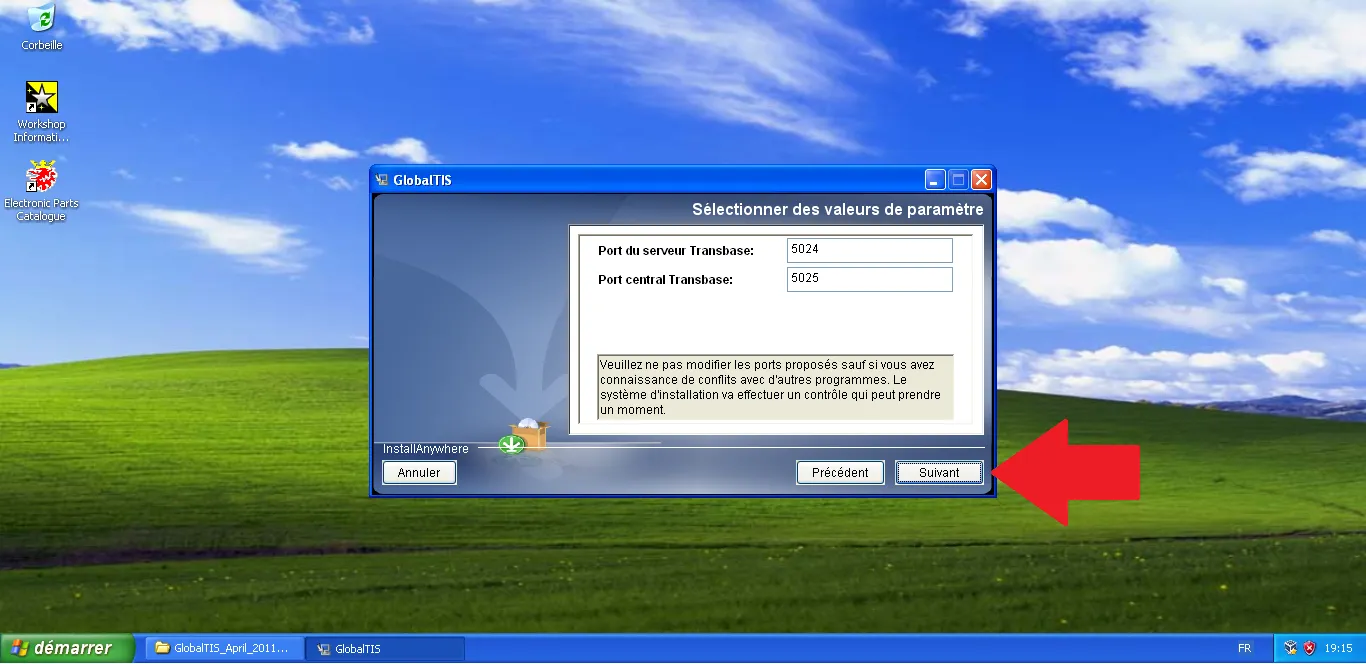
Transbase ports
Verify Transbase ports (5024/5025) and click 'Next'.
Step Visual Reference
21
Tomcat ports
Verify Tomcat ports (9080, 9090, 9091, 9092) and click 'Next'.
Step Visual Reference

22
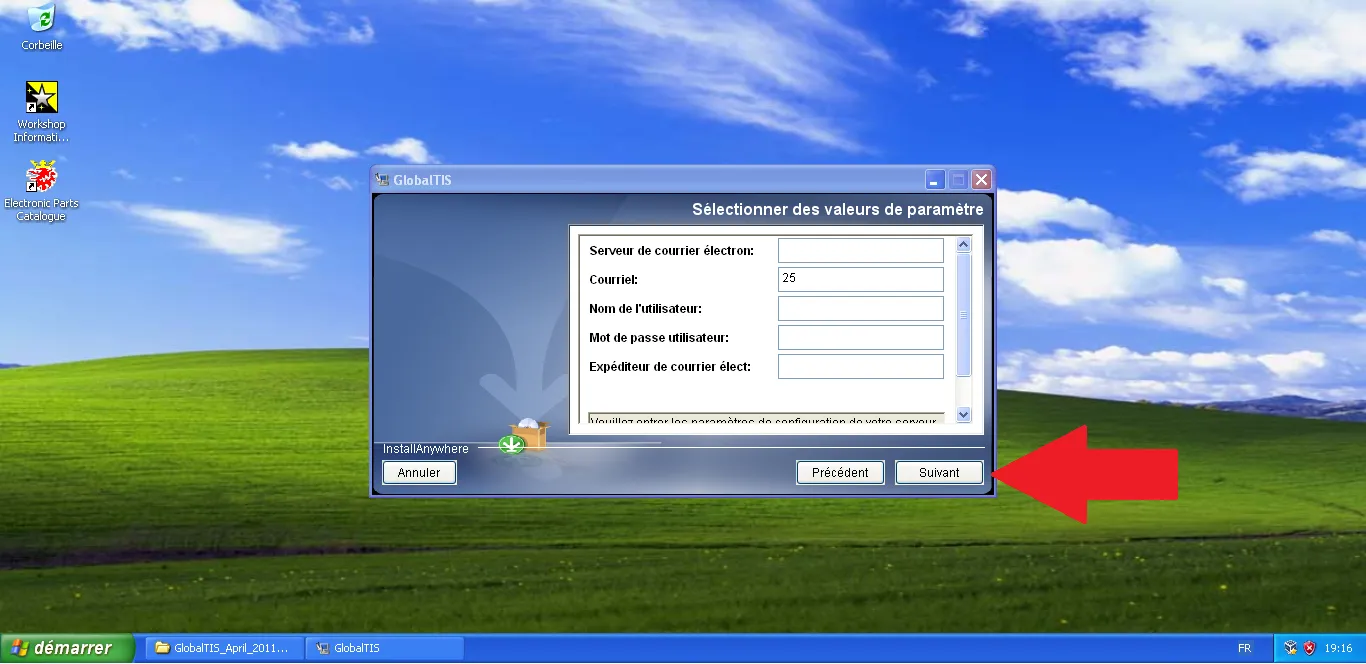
Mail server (Skip)
Leave empty if not used and click 'Next'.
Step Visual Reference
23
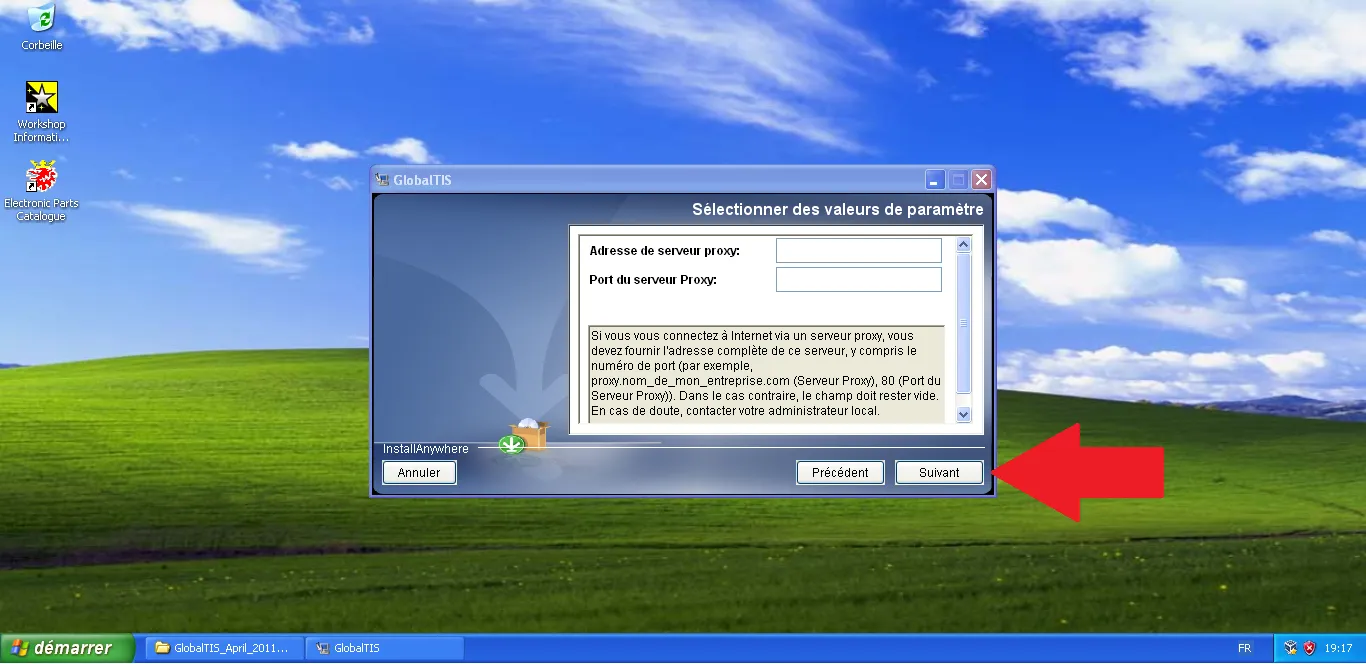
Proxy (Skip)
Leave fields empty if no proxy is required.
Step Visual Reference
24
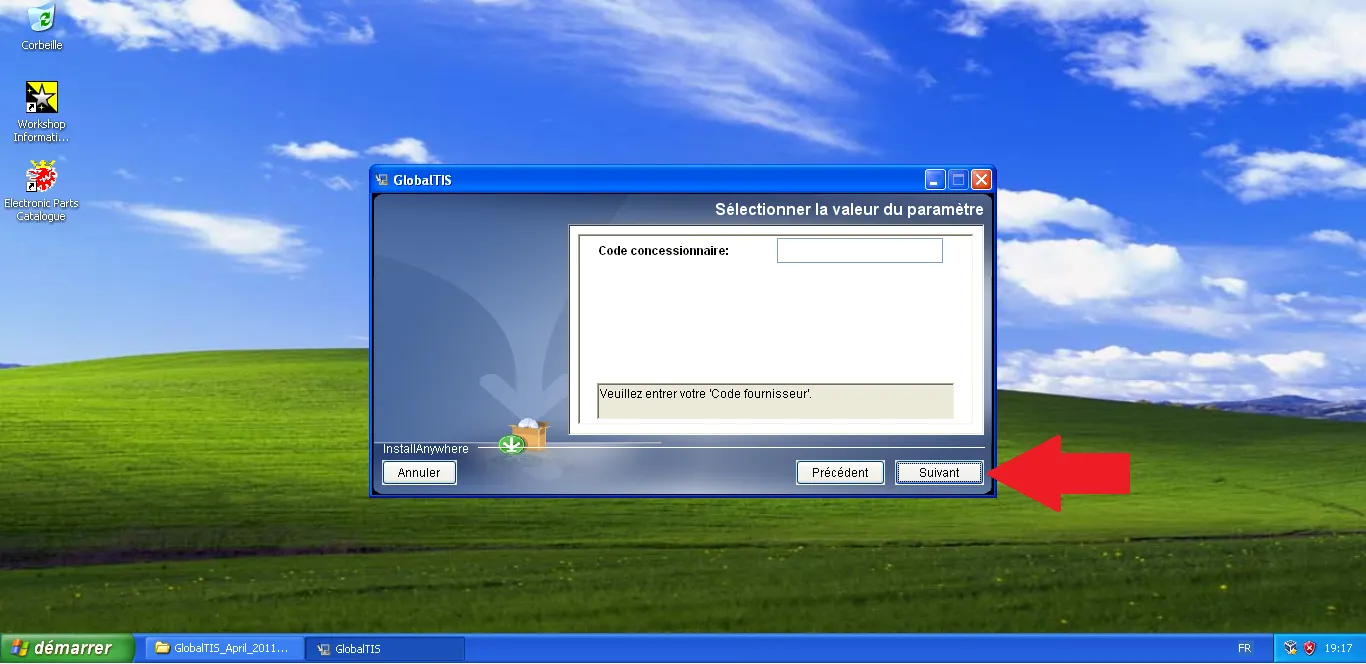
Dealer code
Enter dealer code if necessary, then click 'Next'.
Step Visual Reference
25
Summary
Verify the summary then click 'Install'.
Step Visual Reference

26
Windows warning
When the USB driver warning appears, click 'Continue'.
Step Visual Reference

27
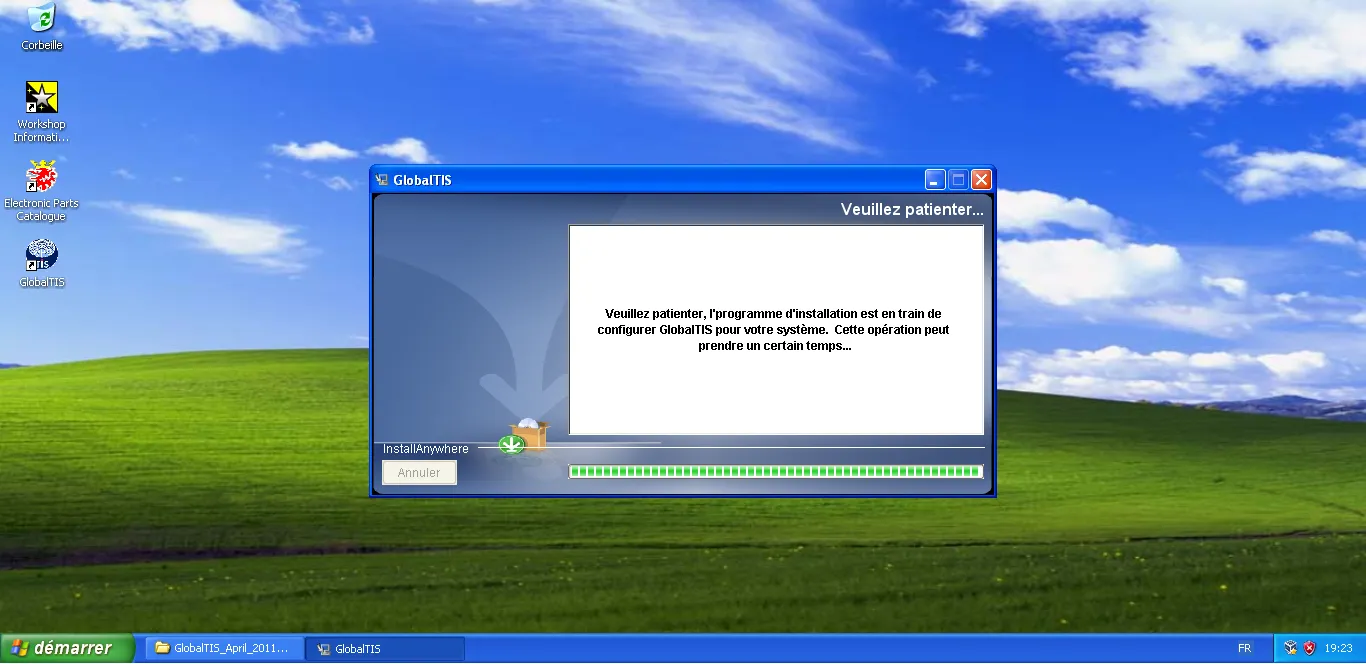
Wait for setup
The installer is configuring GlobalTIS, wait for the process to finish.
Step Visual Reference
28
Completion
Click 'Finish'; the GlobalTIS icon appears on the desktop.
Step Visual Reference

29
Cancel network wizard
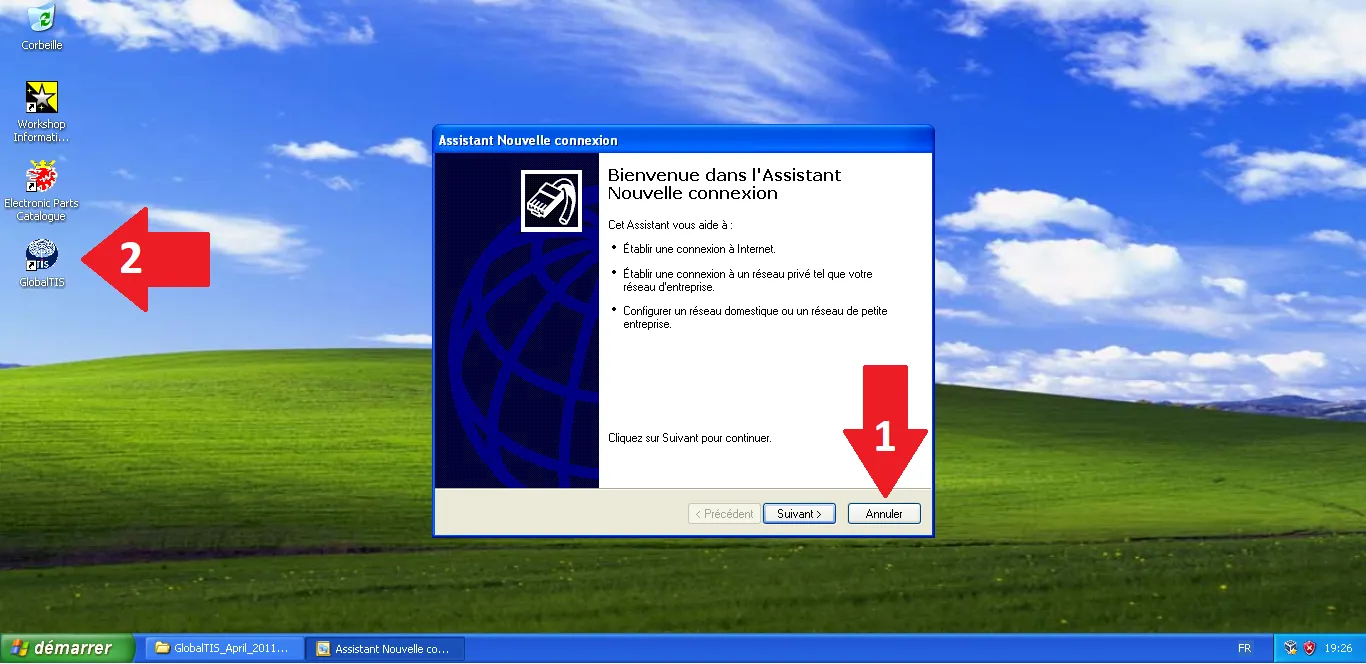
If the 'New Connection' wizard opens, click 'Cancel'.
Step Visual Reference